Filters provide a convenient and efficient way to target specific devices, unlike the traditional method of using “dynamic groups”, which can take time to update when new or updated devices are added. With filters, we can quickly and easily target devices without having to wait for membership lists to be updated. This makes filters a valuable tool for many different applications.
Filters can be targeted towards the following device types.
- iOS/iPadOS
- Windows 10 and later
- Android Device administrator
- macOS
- Android Enterprise
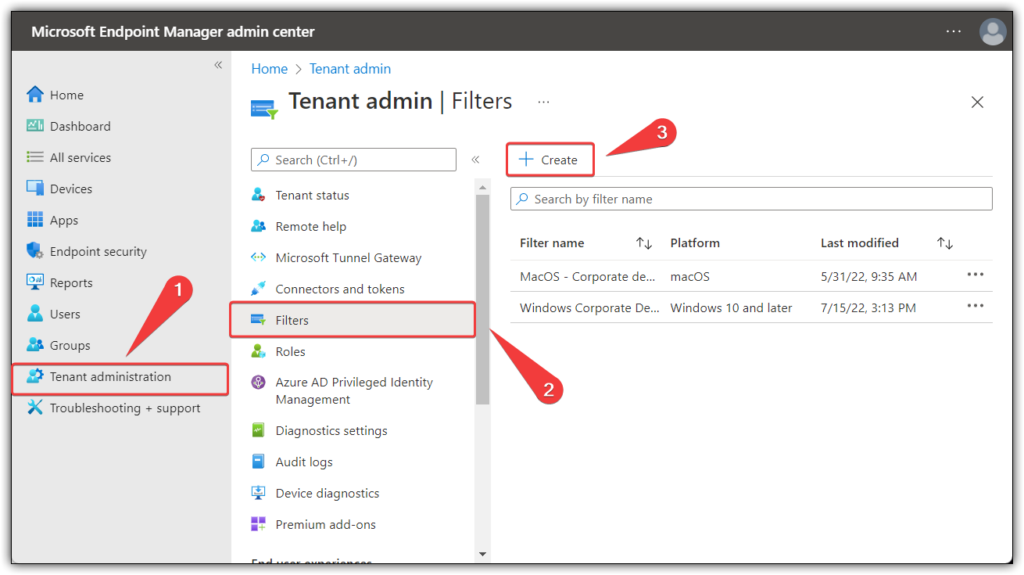
Step 1: Create Filter
Start by going to the endpoint manager admin center and navigate to “Tenant administration > Filters” and click on “Create“
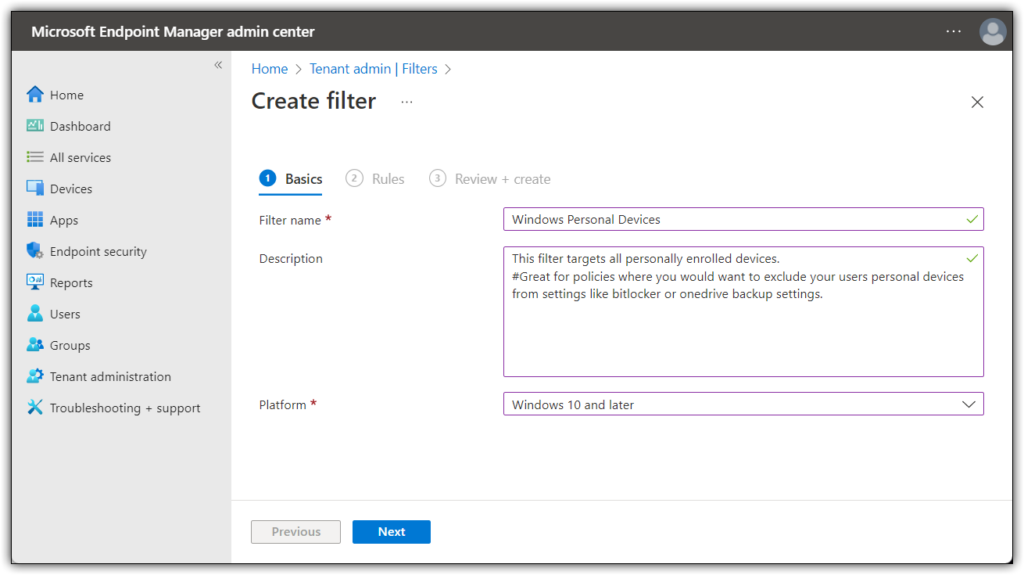
Give your filter a name and a brief description.
In my case i will be creating a filter that targets personal devices and exclude them from my OneDrive policy.
Platform: Windows 10 and later
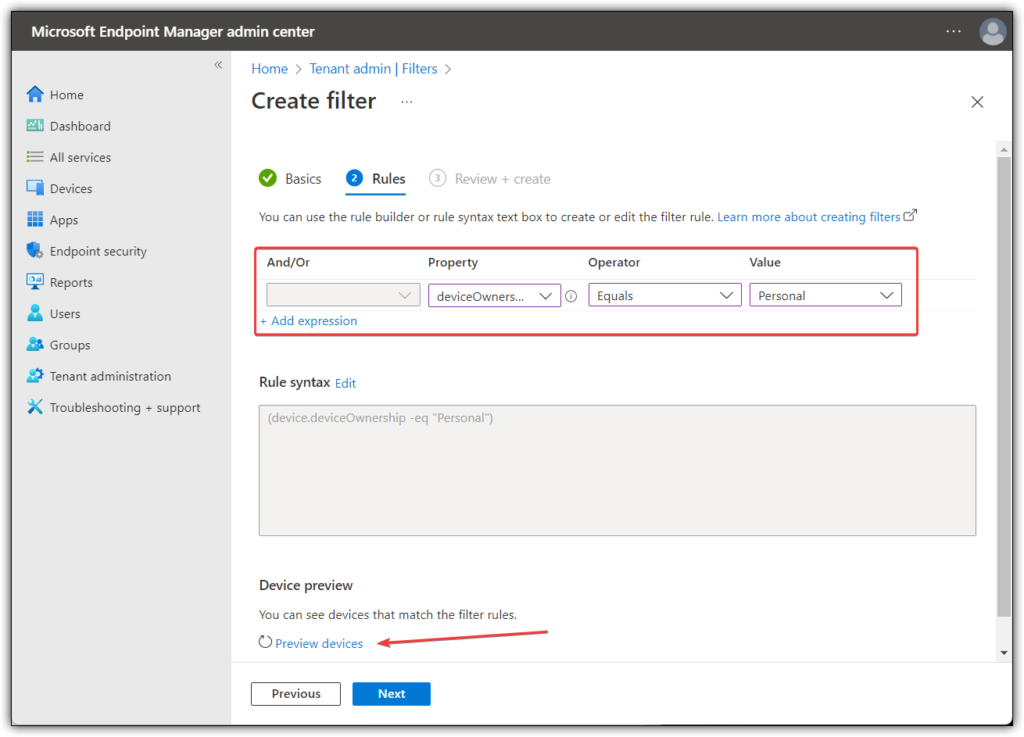
I will be choosing to set my rules to look for the property “DeviceOwnership” and set it to target devices if the property “Equals” “Personal“.
Keep in mind the “Preview Devices” button at the bottom of the page. This is amazing to verify that you are actually targeting the devices you want using your filter.
Click next and create.
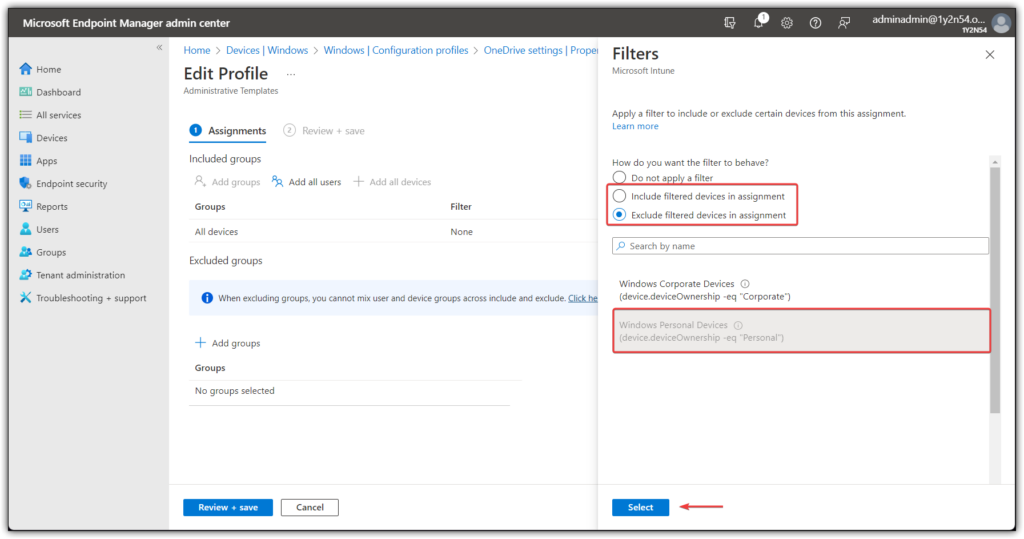
Step 2: Apply your filter.
Find your desired policy and change “Assignment” and click on the “Add all devices” button and chose “Edit filter“
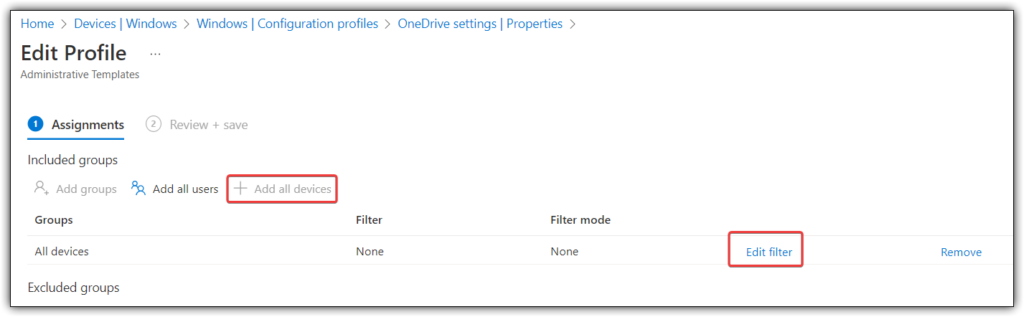
Here you can choose to either include or exclude the filter you created earlier.
If you have any questions / feedback or would like to correct me on any of the stuff above, please use the comment section or contact me directly using the blue button in the bottom right corner.
Leave a Reply